Create a Docker Swarm Cluster in DigitalOcean with Docker Machine
In this article, I’m going to go through the steps on how I was able to create a Docker Swarm Cluster in Digital Ocean using Docker Machine.
Create Digital Ocean Account
First of all, you’ll need an account in Digital Ocean.
For those who doesn’t have an account in Digital Ocean, you may register from here: https://m.do.co/c/df63f05532f9.
You’ll get a free $10 credits to avoid paying, since starting up a droplet isn’t for free.
Generate Access Token
Once you have logged into your Digital Ocean account, click the API link from the navigation bar. And in the Tokens/Keys tab, click the Generate New Token button.
You’ll be asked to enter a name for the new token. You may name it to whatever you want.
Once you’ve assigned the name, click the Generate Token button. Please take note of the Access Token as you will need it later.
Add SSH Key
Next, you have to add your SSH key. Add your SSH key from the Security Settings. Here’s a link to the security settings: https://cloud.digitalocean.com/settings/security.
Note: If you don’t have an SSH key yet, here’s a link on how to create one.
Once you have successfully added the SSH key, make sure to take note of the Fingerprint as you will need it in the next step.
Set Option Values to Environment Variable (Optional)
This step optional, but it is recommended to avoid executing long commands when we later create docker hosts with Docker Machine.
In your terminal, run the command below:
IMPORTANT! Make sure to change the values to your details, especially the DIGITALOCEAN_ACCESS_TOKEN and DIGITALOCEAN_SSH_KEY_FINGERPRINT, which you have created earlier!
Here’s a link to the list of available regions and its available sizes: https://developers.digitalocean.com/documentation/v2/#list-all-regions
export DIGITALOCEAN_ACCESS_TOKEN="";
export DIGITALOCEAN_REGION="sgp1";
export DIGITALOCEAN_SIZE="s-1vcpu-1gb";
export DIGITALOCEAN_SSH_KEY_FINGERPRINT=""
Create the Hosts with Docker Machine
Now let’s create 3 hosts in Digital Ocean with Docker Engine already installed using the Docker Machine CLI. We’ll name each hosts as node1, node2, and node3 for simplicity. Of course, you may name it to whatever you want. Note: If you are using Docker for Mac or Docker for Windows, docker-machine CLI is already installed. For linux users, please install the CLI from here.
If you haven’t skipped the step of setting the environment variable, run the commands below. (Each commands may take several minutes to finish)
docker-machine create --driver digitalocean node1
docker-machine create --driver digitalocean node2
docker-machine create --driver digitalocean node3
For those who skipped the step, run the commands below instead:
Important! Don’t forget to change the option values with your detail, especially -–digitalocean-access-token and -–digitalocean-ssh-key-fingerprint.
docker-machine create --driver digitalocean --digitalocean-access-token= --digitalocean-region=sgp1 --digitalocean-size=s-1vcpu-1gb --digitalocean-ssh-key-fingerprint= node1

docker-machine create --driver digitalocean --digitalocean-access-token= --digitalocean-region=sgp1 --digitalocean-size=s-1vcpu-1gb --digitalocean-ssh-key-fingerprint= node2

docker-machine create --driver digitalocean --digitalocean-access-token= --digitalocean-region=sgp1 --digitalocean-size=s-1vcpu-1gb --digitalocean-ssh-key-fingerprint= node3
If you go back to the dashboard in Digital Ocean, you will see three new droplets being created.
You can also run the command below to list the hosts that has been created:
docker-machine ls
Initialize Docker Swarm/Cluster Manager
Now let’s initialize docker swarm, and assign one of the nodes as the swarm manager. Just take note that depending on your project, you may want more than one manager. You will know why throughout this article. But for simplicity of this article, we’re just going to have one manager.
Let’s make node1 as our swarm manager. You can easily SSH into node1 with docker machine:
docker-machine ssh node1
The command below will initialize swarm, but before running the command, as you may have noticed, we have the -–advertise-addr option. Get the IP address of node1 by running docker-machine ls, and copy the IP address from the URL column and set is as the value of -–advertise-addr.
root@node1$ docker swarm init --advertise-addr 206.189.33.207
Once you run the command above, you’ll get a similar output below:
Swarm initialized: current node (cfdcqk3ipda1es8a3vdldv0rt) is now a manager.

To add a worker to this swarm, run the following command:

    docker swarm join --token SWMTKN-1-375ib6ob99lyqd8kl44mv8k5ibfozambxpvc9i9ibrjrr0zg3x-9i9wmm55mp3asdeqaedr3gv3g 206.189.33.207:2377

To add a manager to this swarm, run 'docker swarm join-token manager' and follow the instructions.
Copy the join command above for worker, as we’re going to set node2 and node3 as our worker.
Add Worker Nodes to the Swarm
Open two new tabs in your terminal for node2 and node3 and SSH into each hosts.
Tab 2
$ docker-machine ssh node2

root@node2$ docker swarm join --token SWMTKN-1-375ib6ob99lyqd8kl44mv8k5ibfozambxpvc9i9ibrjrr0zg3x-9i9wmm55mp3asdeqaedr3gv3g 206.189.33.207:2377
Tab 3
$ docker-machine ssh node3

root@node3$ docker swarm join --token SWMTKN-1-375ib6ob99lyqd8kl44mv8k5ibfozambxpvc9i9ibrjrr0zg3x-9i9wmm55mp3asdeqaedr3gv3g 206.189.33.207:2377
Now let’s go back to tab of node1 and run the command below to list the nodes included in the swarm:
root@node1$ docker node ls
Note: Only a manager node can run the command above, thus we have to run it on node1.
You should see a result similar to this:
NAME    ACTIVE   DRIVER         STATE     URL                         SWARM   DOCKER        ERRORS
node1   -        digitalocean   Running   tcp://206.189.33.207:2376           v18.06.0-ce
node2   -        digitalocean   Running   tcp://206.189.84.200:2376           v18.06.0-ce
node3   -        digitalocean   Running   tcp://206.189.91.187:2376           v18.06.0-ce
Now you have a Docker Swarm Cluster on Digital Ocean with three nodes running. Let’s test it by running some containers by deploying a stack.
Create a docker-compose.yml file. You may create it directly inside node1, but I’m going to create it on my local machine, so that I can also show you how to copy a file from a local machine to a remote docker machine host.
version: "3"

services:

  web:
    image: onoya/express-hello-world
    deploy:
      replicas: 5
      restart_policy:
        condition: on-failure
    ports:
      - "80:80"

  visualizer:
    image: dockersamples/visualizer:stable
    ports:
      - "8080:8080"
    volumes:
      - "/var/run/docker.sock:/var/run/docker.sock"
    deploy:
      placement:
        constraints: [node.role == manager]
Here’s the command on how to copy the docker-compose file from your local machine into node1.
docker-machine scp docker-compose.yml node1:/root
Now lets SSH back into node1 and deploy the app:
$ docker-machine ssh node1

root@node1$ docker stack deploy -c docker-compose.yml helloworld
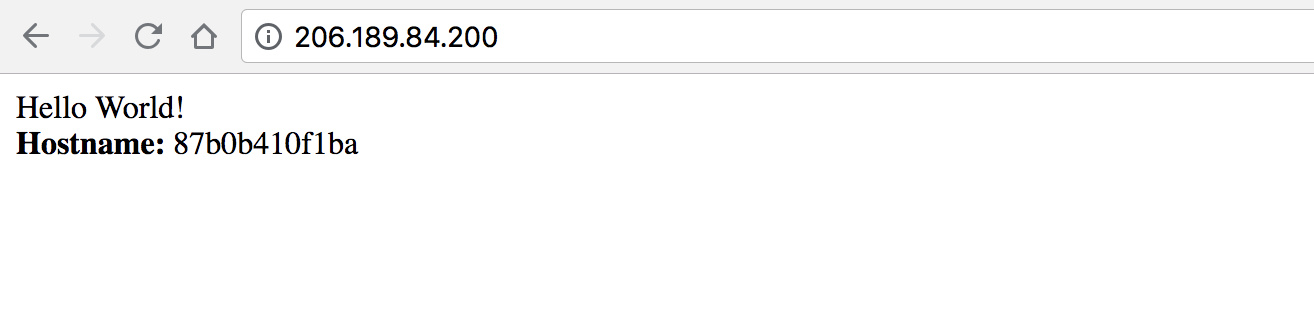
Now try to access any of the IP Address of your nodes on port.
You should see a page similar to the one below:
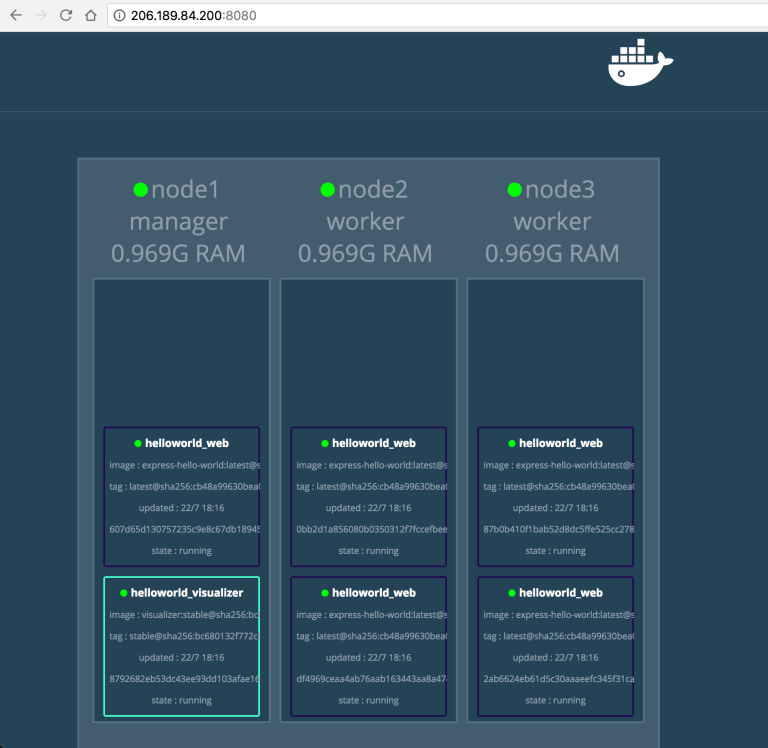
Go port 8080 to acces the Visualizer. Here you can see your containers being spread across the nodes of your cluster:
To destroy a node, run the command below:
docker-machine rm node3
If you try to go back to the Visualizer, you can see that the containers in node3 is automatically spread into node1 and node2.